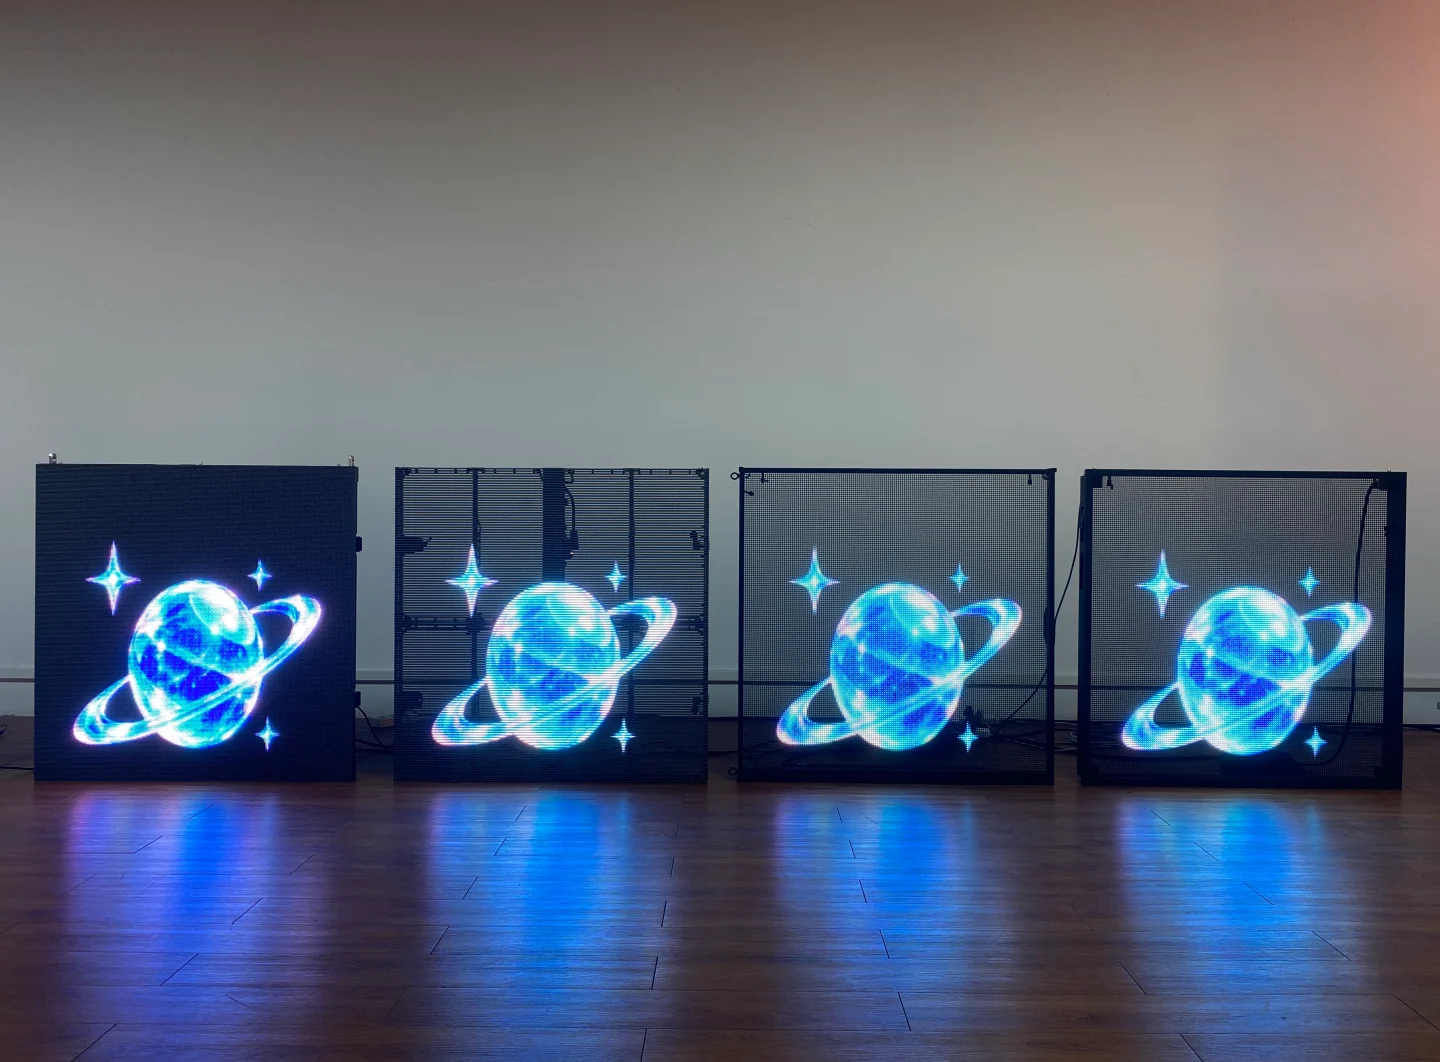
3M Tape vs. Glue: Mounting Holographic LED Displays on Glass
Mounting a holographic LED display directly onto glass requires more than simply choosing an adhesive. The right installation method affects mounting stability, heat dissipation, maintenance accessibility, and the potential for future removal or reuse.
For indoor applications, two common direct-mounting methods are full-surface adhesive bonding and localized double-sided tape bonding. Each method has its own advantages and limitations.
So, which method should you choose for your indoor holographic LED display project?
Let’s compare the two approaches.
Full-Surface Adhesive Bonding: Simple Installation, Challenging Maintenance
Full-surface adhesive bonding involves applying glue evenly across the designated bonding area of an LED panel before attaching it directly to the glass.
The adhesive creates a continuous bonding interface between the LED panel and the glass, providing a relatively large contact area.
Advantages of Full-Surface Adhesive Bonding
The main advantage is installation convenience.
Once the adhesive has been applied, the installer can position the LED panel directly onto the glass. The process is relatively straightforward and requires no pre-cut tape or multiple bonding points.
For projects where permanent installation is the priority and future removal is unlikely, this method may be worth considering.
Potential Drawbacks
Despite its installation convenience, full-surface bonding has several limitations.
1. Limited Heat Dissipation
When the LED panel is bonded across a large surface area, airflow between the panel and glass is restricted.
This can make heat dissipation more difficult, potentially increasing LED operating temperatures during long-term operation.
2. Difficult Removal and Adhesive Residue
Removing a fully bonded LED panel can be time-consuming.
Depending on the adhesive type and bonding duration, substantial adhesive residue may remain on both the LED panel and the glass.
Cleaning the glass requires additional work, while removing adhesive from the LED panel can be even more challenging. And the LED panels may be difficult to reuse after removal, making this method less suitable for installations that require future relocation.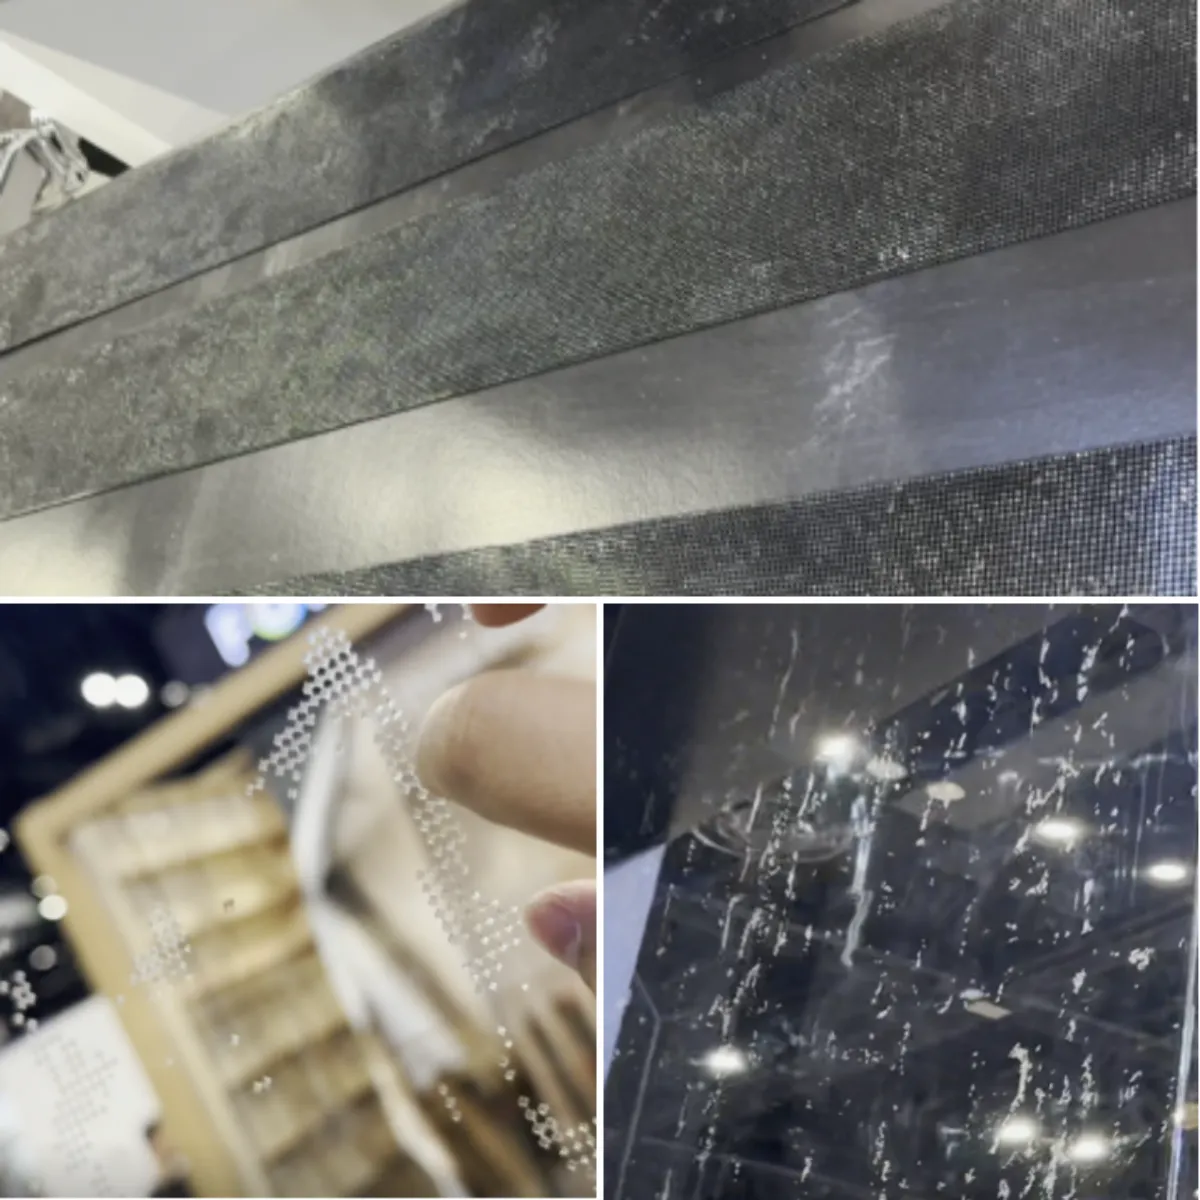
3. Potential LED Damage with LED-Side Bonding
If the LED-emitting surface is bonded directly to the glass, the LEDs are in close contact with the glass surface.
This arrangement can restrict heat dissipation and increase the risk of LED damage during installation or removal.
For direct glass bonding, PCB-side installation is generally preferable to LED-side bonding.
3M Double-Sided Tape Spot Bonding: A More Flexible Installation Solution
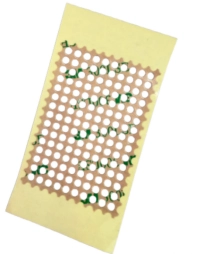
Unlike full-surface bonding, 3M double-sided tape spot bonding uses pre-cut, high-temperature-resistant tape at designated points on the LED panel.
Instead of covering the entire bonding surface with glue, the tape is applied locally to create secure attachment points.
This approach reduces the contact area between the LED panel and glass while maintaining reliable fixation.
At InVisia Displays, we recommend this method for most indoor holographic transparent LED display projects that require direct glass mounting.
Why Choose 3M Tape Spot Bonding?
1. Reliable Adhesion with Heat-Resistant Tape
High-quality 3M double-sided tape provides strong adhesion and reliable fixation when properly selected and applied.
For LED display applications, the tape specifications should match the panel design and operating requirements.
InVisia provides pre-cut tape according to the LED panel’s pixel pitch and specifications, helping ensure accurate positioning and convenient installation.
2. Better Heat Dissipation
One important advantage of localized tape bonding is the reduced contact area between the LED panel and glass.
Unlike full-surface adhesive bonding, the entire LED module is not covered with adhesive. This allows more open space and provides better conditions for heat dissipation.
Although it does not provide the same airflow as a stand-off mounting structure, it offers a more practical balance between direct glass attachment and thermal management.
3. Easier Removal and Maintenance
Maintenance is where 3M tape spot bonding makes a particularly noticeable difference.
Because the tape is applied only at designated points, individual LED panels can be removed more easily when maintenance or replacement is required.
There is also significantly less adhesive to clean compared with full-surface bonding.
For remaining tape residue, 75% isopropyl alcohol can help loosen the adhesive. Apply it from the edge of the bonded area, allow approximately 15–20 seconds for it to penetrate, and then carefully begin removing the panel.
Any remaining tape can generally be peeled away by hand, leaving the glass surface clean with minimal residue.
4. Better Potential for Reuse
For rental companies, AV integrators, and commercial display projects that may require relocation, reconfiguration, or future maintenance, reusability is an important consideration.
Compared with full-surface glue bonding, localized tape bonding makes panel removal easier and reduces the amount of adhesive residue left behind.
This helps preserve the condition of both the LED panels and the glass, making future reuse more practical.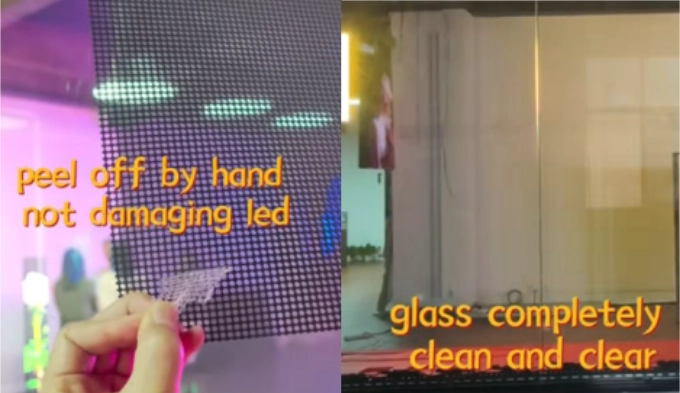
3M Tape vs. Full-Surface Glue: Side-by-Side Comparison
Here is a quick comparison of the two direct glass-mounting methods.
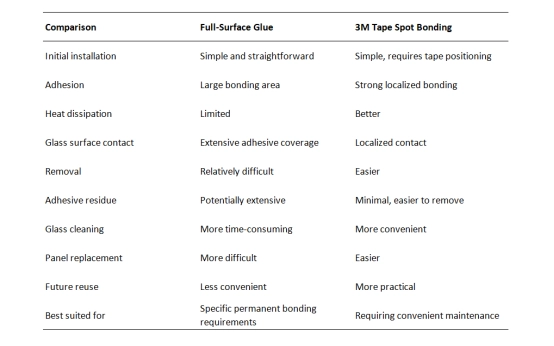
Our recommendation: For most indoor holographic transparent LED displays mounted directly on glass, 3M double-sided tape spot bonding offers a better balance of secure installation, heat dissipation, and long-term maintenance.
How to Install Holographic LED Displays Using 3M Double-Sided Tape
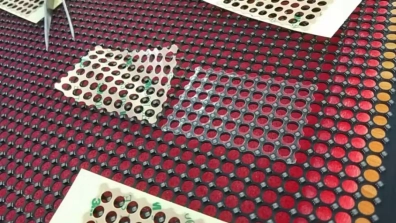
With pre-cut 3M tape prepared for the LED panels, the installation process is relatively simple.
Step 1: Clean the Glass Surface
Remove dust, oil, and other contaminants from the glass to ensure proper adhesion.
Step 2: Apply the 3M Double-Sided Tape
Attach the pre-cut 3M tape to the designated bonding points on the LED panel, following the recommended positioning.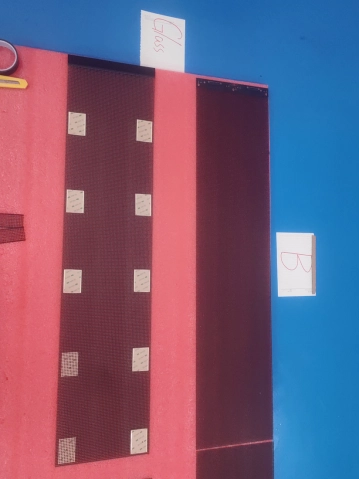
Step 3: Position and Attach the LED Panel
Carefully align the LED panel with the installation marks and press it against the glass to establish secure contact.
Step 4: Check Alignment and Level
Use a level tool to ensure the panel is properly aligned before proceeding with the next panel.
Step 5: Connect the LED Panels
Connect multiple panels using the designated connection accessories to form a complete display.
Step 6: Connect the Power and Control System
Connect the HUB boards, power supplies, receiving cards, and other required components according to the system configuration.
Step 7: Complete the Installation and Test
Check all connections, panel alignment, and display performance before putting the screen into operation.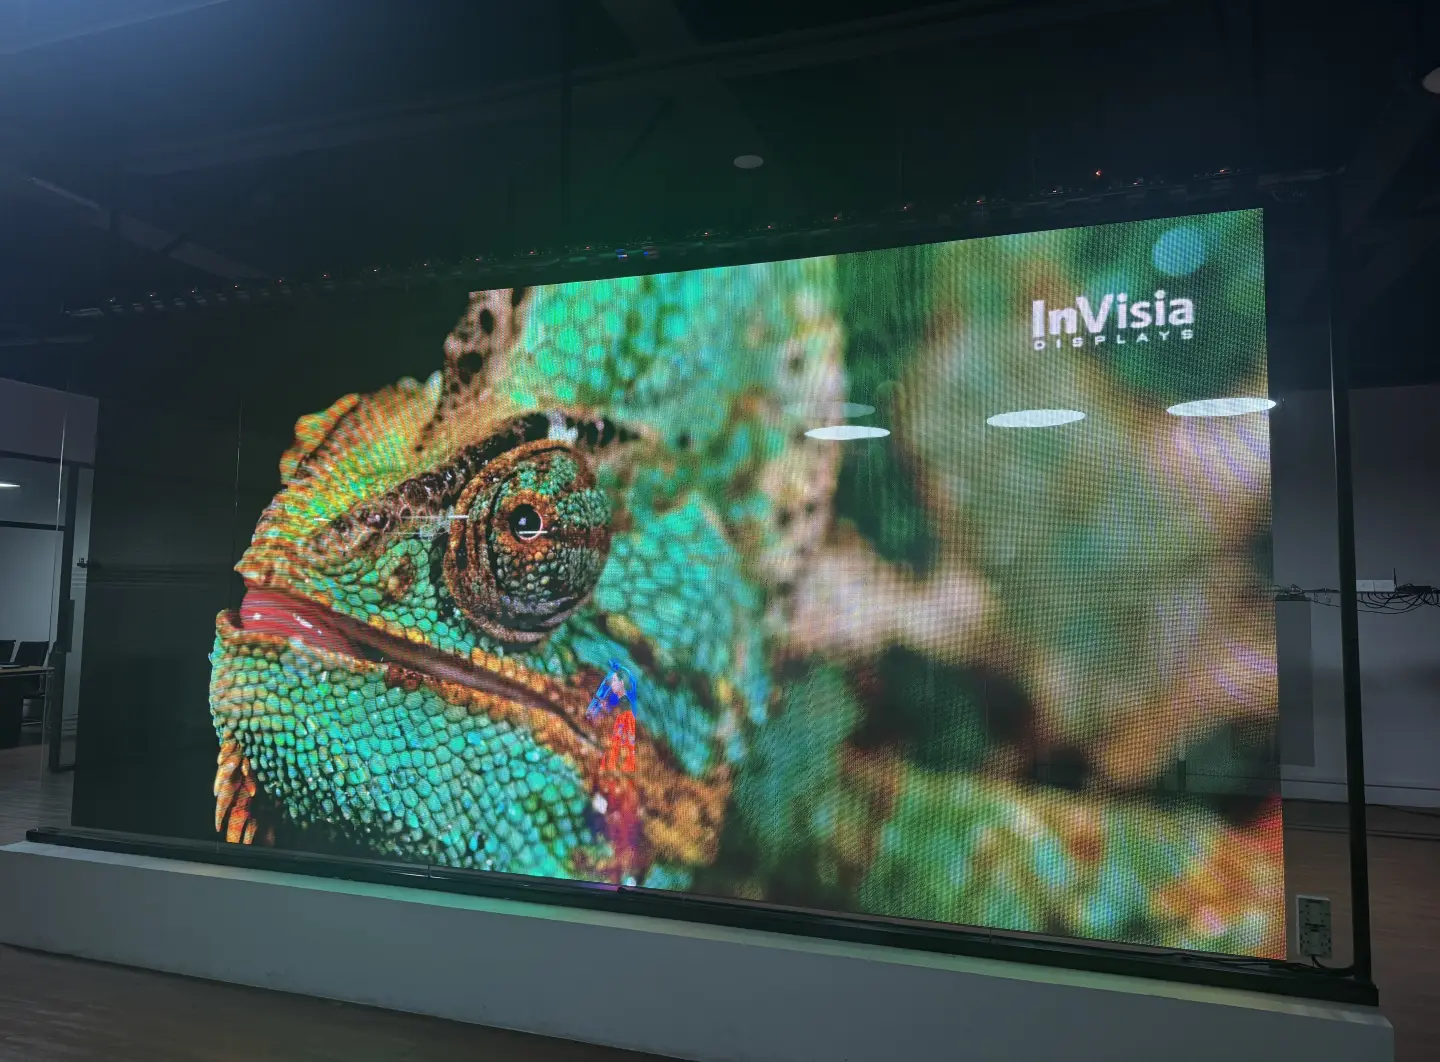
Is Direct Glass Mounting Always the Best Option?
Not necessarily.
Although 3M tape spot bonding is our recommended adhesive solution for many indoor applications, some projects require a more advanced mounting structure.
For example, installations exposed to strong sunlight, high operating temperatures, or demanding long-term operating conditions may benefit from a stand-off mounting solution.
This method uses dedicated support structures to hold the LED panels at a controlled distance from the glass, creating an air gap between the display and the glass surface.
The advantages include:
- Better natural airflow and heat dissipation.
- Reduced direct contact between the LED panels and glass.
- Easier individual panel removal and replacement.
- Improved suitability for demanding glass facade applications.
If you are considering different installation options, read our guide:
Three Glass-Mounting Methods for Holographic LED Displays
It explains LED-side direct mounting, PCB-side direct mounting, and stand-off mounting, helping you identify the right approach for your project.
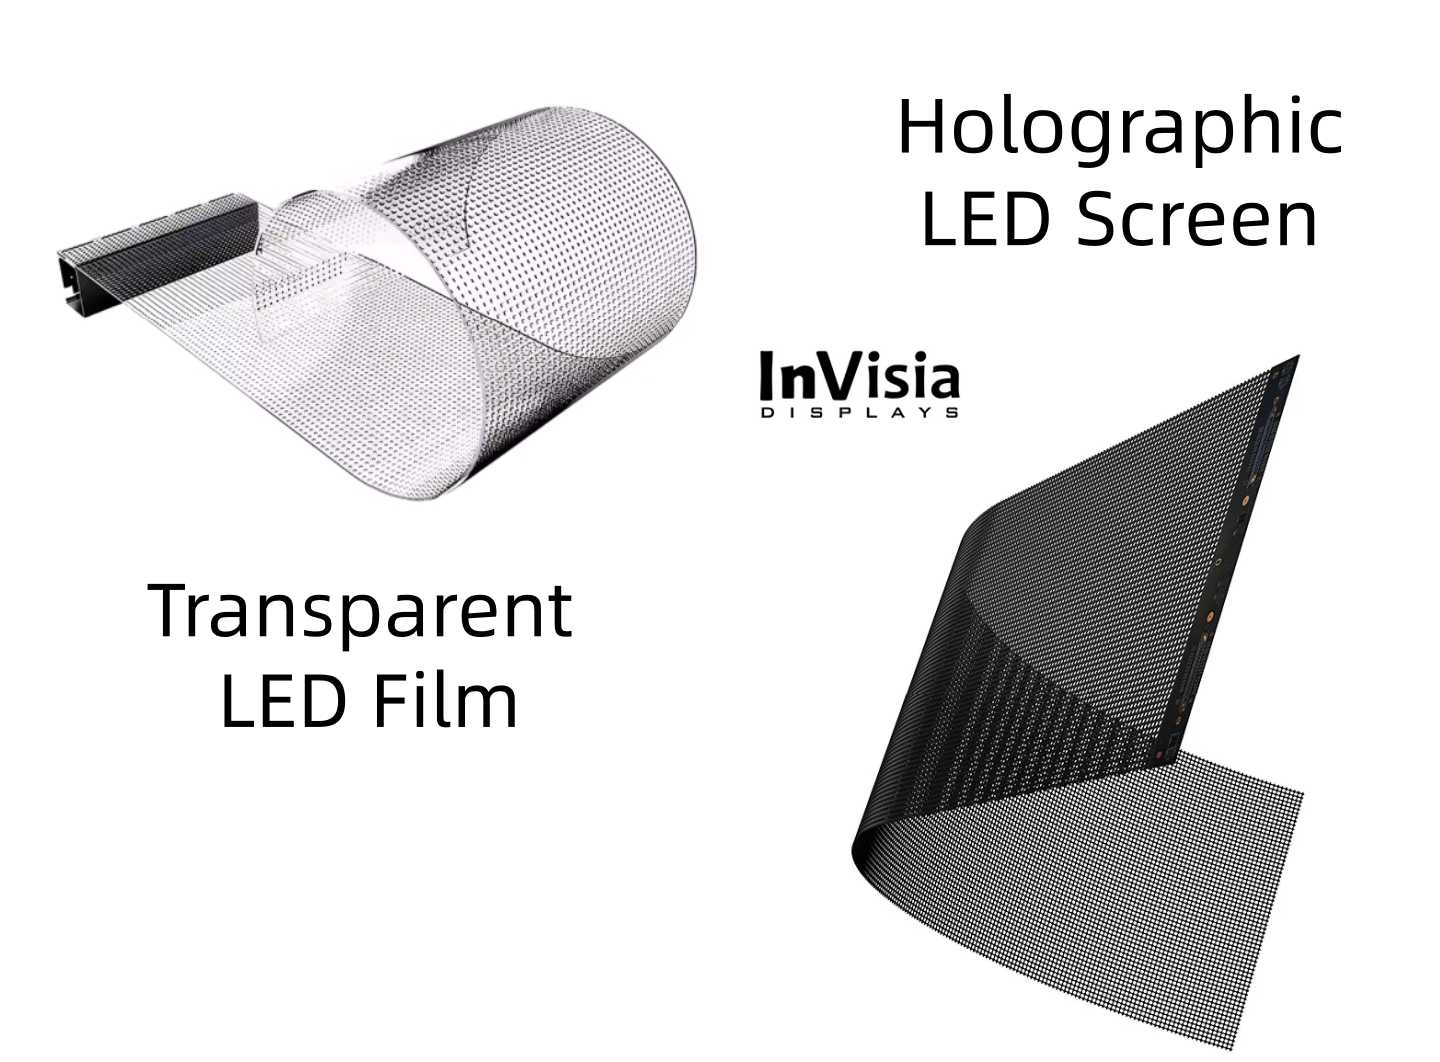
Holographic LED vs. Transparent LED Film: Two Different Glass-Mounting Solutions
Both holographic transparent LED displays and transparent LED films can be installed onto glass, but their maintenance characteristics are quite different.
Transparent LED film uses an adhesive-based PET film structure, while holographic LED displays typically use a mesh structure that offers greater flexibility in mounting and maintenance.
If you are still deciding between these two display technologies, read our detailed comparison: Film LED vs. Holographic LED Display: How to Choose.
Choose the Installation Method Based on Your Project
There is no single mounting method suitable for every holographic LED display project.
The right choice depends on your installation environment, maintenance expectations, and whether the display may need to be removed or reused in the future.
At InVisia Displays, our recommendations are:
- Full-surface adhesive bonding: Consider it when a simple installation and extensive initial bonding area are the main priorities.
- 3M double-sided tape spot bonding: Our recommended adhesive solution for most indoor direct-to-glass installations, offering reliable fixation, better heat dissipation conditions, and easier maintenance.
- Stand-off mounting: A more professional solution for projects requiring improved airflow, convenient panel replacement, and better long-term operating conditions.
At InVisia Displays, we believe that a good installation solution should not only make the display look impressive on day one, but also make it easier to maintain throughout its service life.
FAQs About Holographic LED Display Glass Mounting
Q1. Can holographic LED displays be mounted directly onto glass?
Yes. Holographic LED displays can be installed directly onto glass using suitable adhesive bonding methods or dedicated mounting structures.
The appropriate method depends on the LED panel design, glass conditions, and installation requirements.
Q2. Is 3M double-sided tape better than glue for LED display installation?
For many indoor applications, localized 3M double-sided tape bonding offers easier maintenance and removal than full-surface adhesive bonding.
Q3. Does 3M tape affect LED display heat dissipation?
Localized tape bonding leaves more of the panel surface uncovered than full-surface adhesive bonding.
This can provide better heat dissipation conditions, although it does not offer the airflow advantages of stand-off mounting.
Q4. Can holographic LED displays be removed and reused?
Yes, reuse may be possible depending on the mounting method, adhesive condition, panel integrity, and electrical connections.
Localized tape bonding generally makes individual panel removal easier than full-surface adhesive bonding.
Q5. Should holographic LED displays be mounted from the LED side or PCB side?
The mounting orientation should be determined by the LED module’s mechanical and thermal design.
For direct glass bonding, PCB-side mounting is generally preferable where the panel structure permits.
Looking for the right glass-mounting solution for your holographic transparent LED display project?
Contact InVisia Displays to discuss your application, installation environment, and technical requirements. Our team can help you identify a suitable mounting method for your project.

 5th Floor, Building 9, Hengchangrong High-Tech Industrial Park, Bao'an District, Shenzhen 518128, China